什么是Restful API
什么是Spring MVC
Demo
使用Spring mvc编写简单的Restful API
依赖
1
2
3
4
5
6
7
8
9
10
11
12
13
14
<dependencies>
<dependency>
<groupId>org.springframework.boot</groupId>
<artifactId>spring-boot-starter-test</artifactId>
</dependency>
<dependency>
<groupId>org.projectlombok</groupId>
<artifactId>lombok</artifactId>
</dependency>
<dependency>
<groupId>org.springframework.boot</groupId>
<artifactId>spring-boot-starter-web</artifactId>
</dependency>
</dependencies>版本号使用spring io控制
实体类
1
2
3
4
5
6
7
8
9
10
package com.xushuai.security.pojo;
import lombok.Data;
public class User {
private Integer id;
private String username;
private String password;
}编写Controller
1
2
3
4
5
6
7
8
9
10
11
12
13
14
15
16
17
18
19
20
21
22
23
24
25
26
27
28
package com.xushuai.security.web.controller;
import com.xushuai.security.pojo.User;
import org.springframework.http.ResponseEntity;
import org.springframework.web.bind.annotation.GetMapping;
import org.springframework.web.bind.annotation.PathVariable;
import org.springframework.web.bind.annotation.RestController;
public class UserController {
/**
* 获取user对象
*
* @param id ID并且使用正则表达式限定只能为数字
* @return User对象
*/
("/user/{id:\\d+}")
public ResponseEntity<User> getUser(@PathVariable String id) {
User user = new User();
user.setId(1);
user.setUsername("baker-1");
user.setPassword("abc");
return ResponseEntity.ok(user);
}
}使用MockMvc伪造浏览器进行测试
1
2
3
4
5
6
7
8
9
10
11
12
13
14
15
16
17
18
19
20
21
22
23
24
25
26
27
28
29
30
31
32
33
34
35
36
37
38
39
40
41
42
43
package com.xushuai.security.web.controller;
import org.junit.Before;
import org.junit.Test;
import org.junit.runner.RunWith;
import org.springframework.beans.factory.annotation.Autowired;
import org.springframework.boot.test.context.SpringBootTest;
import org.springframework.context.annotation.Bean;
import org.springframework.http.MediaType;
import org.springframework.test.context.junit4.SpringRunner;
import org.springframework.test.web.servlet.MockMvc;
import org.springframework.test.web.servlet.MockMvcBuilder;
import org.springframework.test.web.servlet.RequestBuilder;
import org.springframework.test.web.servlet.request.MockMvcRequestBuilders;
import org.springframework.test.web.servlet.result.MockMvcResultMatchers;
import org.springframework.test.web.servlet.setup.MockMvcBuilders;
import org.springframework.web.context.WebApplicationContext;
import static org.junit.Assert.*;
(SpringRunner.class)
public class UserControllerTest {
private WebApplicationContext webApplicationContext;
private MockMvc mockMvc;
public void setUp() throws Exception {
mockMvc = MockMvcBuilders.webAppContextSetup(webApplicationContext).build();
}
public void getUserTest() throws Exception {
mockMvc.perform(MockMvcRequestBuilders.get("/user/1") // 发送get请求,对应的有post,put,delete等
.contentType(MediaType.APPLICATION_JSON_UTF8)) // 设置contentType
.andExpect(MockMvcResultMatchers.status().isOk()) // 校验返回的状态码是否为200
.andExpect(MockMvcResultMatchers.jsonPath("$.username").value("baker-1")); // 校验返回的json对象中的username属性是否为baker-1
}
}可以快速定位和操作json的方法
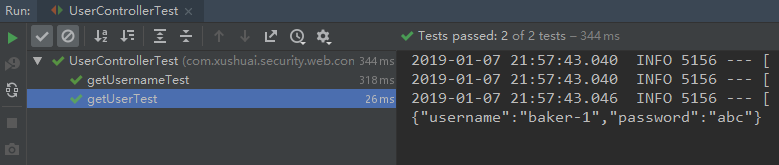
测试

测试通过
使用JsonView控制返回的数据
定义JsonView
在实体类中自定义视图
1
2
3
4
5
6
7
8
9
10
11
12
13
14
15
16
17
18
19
20
21
22
package com.xushuai.security.pojo;
import com.fasterxml.jackson.annotation.JsonView;
import lombok.Data;
public class User {
public interface UsernameView {
}
public interface UserView extends UsernameView {
}
(UserView.class)
privcate Integer id;
(UsernameView.class)
private String username;
(UserView.class)
private String password;
}声明UsernameView接口,并在
username字段上使用@JsonView注解标识该字段在UsernameView视图中展示。声明UserView接口,并在
id和password字段上使用@JsonView注解标识该字段在UserView视图中展示,因为UserView接口实现了UsernameView接口缘故,username字段也会在UserView视图中被展示。编写Controller,并修改之前的Restful Api
1
2
3
4
5
6
7
8
9
10
11
12
13
14
15
16
17
18
19
20
21
22
23
24
25
26
27
28
29
30
31
32
33
34
35
36
37
38
39
40
41
42
package com.xushuai.security.web.controller;
import com.fasterxml.jackson.annotation.JsonView;
import com.xushuai.security.pojo.User;
import org.springframework.http.ResponseEntity;
import org.springframework.web.bind.annotation.GetMapping;
import org.springframework.web.bind.annotation.PathVariable;
import org.springframework.web.bind.annotation.RestController;
public class UserController {
/**
* 获取user对象
*
* @param id ID并且使用正则表达式限定只能为数字
* @return User对象
*/
("/user/{id:\\d+}")
(User.UserView.class)
public ResponseEntity<User> getUser(@PathVariable String id) {
User user = new User();
user.setId(1);
user.setUsername("baker-1");
user.setPassword("abc");
return ResponseEntity.ok(user);
}
("/user/username/{id:\\d+}")
(User.UsernameView.class)
public ResponseEntity<User> getUsername(@PathVariable String id) {
User user = new User();
user.setId(2);
user.setUsername("baker-2");
user.setPassword("abc2");
return ResponseEntity.ok(user);
}
}使用
@JsonView注解限制返回的数据编写测试用例
1
2
3
4
5
6
7
8
9
10
11
12
13
14
15
16
17
18
19
20
21
22
23
24
25
26
27
28
29
30
31
32
33
34
35
36
37
38
39
40
41
42
43
44
45
46
47
48
49
50
51
52
53
54
55
56
57
package com.xushuai.security.web.controller;
import org.junit.Before;
import org.junit.Test;
import org.junit.runner.RunWith;
import org.springframework.beans.factory.annotation.Autowired;
import org.springframework.boot.test.context.SpringBootTest;
import org.springframework.context.annotation.Bean;
import org.springframework.http.MediaType;
import org.springframework.test.context.junit4.SpringRunner;
import org.springframework.test.web.servlet.MockMvc;
import org.springframework.test.web.servlet.MockMvcBuilder;
import org.springframework.test.web.servlet.RequestBuilder;
import org.springframework.test.web.servlet.request.MockMvcRequestBuilders;
import org.springframework.test.web.servlet.result.MockMvcResultMatchers;
import org.springframework.test.web.servlet.setup.MockMvcBuilders;
import org.springframework.web.context.WebApplicationContext;
import static org.junit.Assert.*;
(SpringRunner.class)
public class UserControllerTest {
private WebApplicationContext webApplicationContext;
private MockMvc mockMvc;
public void setUp() throws Exception {
mockMvc = MockMvcBuilders.webAppContextSetup(webApplicationContext).build();
}
public void getUserTest() throws Exception {
String result = mockMvc.perform(MockMvcRequestBuilders.get("/user/1") // 发送get请求,对应的有post,put,delete等
.contentType(MediaType.APPLICATION_JSON_UTF8)) // 设置contentType
.andExpect(MockMvcResultMatchers.status().isOk()) // 校验返回的状态码是否为200
.andExpect(MockMvcResultMatchers.jsonPath("$.username").value("baker-1"))
.andReturn().getResponse().getContentAsString();// 校验返回的json对象中的username属性是否为baker-1
System.out.println(result);
}
public void getUsernameTest() throws Exception {
String result = mockMvc.perform(MockMvcRequestBuilders.get("/user/username/1") // 发送get请求,对应的有post,put,delete等
.contentType(MediaType.APPLICATION_JSON_UTF8)) // 设置contentType
.andExpect(MockMvcResultMatchers.status().isOk()) // 校验返回的状态码是否为200
.andExpect(MockMvcResultMatchers.jsonPath("$.username").value("baker-2"))
.andReturn().getResponse().getContentAsString();// 校验返回的json对象中的username属性是否为baker-1
System.out.println(result);
}
}运行两个测试方法
getUserTest()
getUsernameTest()

使用@Valid注解校验数据
- Hibernate Validator注解介绍
| 注解 | 含义 |
|---|---|
| @Valid | 被注释的元素是一个对象,需要检查此对象的素有字段值 |
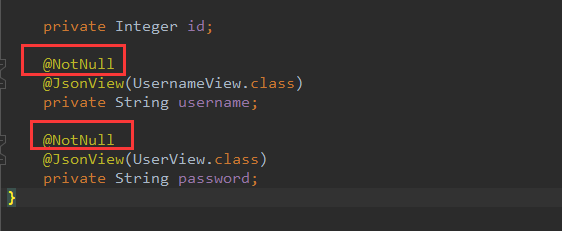
| @Null | 被注释的元素必须为null |
| @NotNull | 被注释的元素必须不为null |
| @AssertTrue | 被注释的元素必须为true |
| @AssertFalse | 被注释的元素必须为false |
| @Min(value) | 被注释的元素必须是一个数字,其值必须大于等于指定的最小值 |
| @Max(value) | 被注释的元素必须是一个数字,其值必须小于等于指定的最大值 |
| @DecimalMin(value) | 与@Min作用相同,主要针对高精度的BigDecimal类型 |
| @DecimalMax(value) | 与@Max作用相同,主要针对高精度的BigDecimal类型 |
| @Size(max,min) | 被注释的元素的大小必须再指定的范围内 |
| @digits(integer,fraction) | 被注释的元素必须是一个数字,其值必须在可接受的范围内 |
| @Past | 被注释的元素必须是一个过去的日期 |
| @Future | 被注释的元素必须是一个将来的日期 |
| @Pattern(value) | 被注释的元素必须符合指定的正则表达式 |
DecimalMin和DecimalMax可以使用inclusive制定是否等于,为true则包含等于。
使用Validator
在实体类中加入相关注解
编写restful api
1
2
3
4
5
6
7
8
9("/user")
public ResponseEntity<User> addUser(@Valid @RequestBody User user, BindingResult bindingResult) {
if (bindingResult.hasErrors()) {// 打印错误信息
bindingResult.getAllErrors().forEach(error -> System.out.println(error.getDefaultMessage()));
}
user.setId(3);
// 创建成功返回的状态码为:201
return ResponseEntity.status(HttpStatus.CREATED).body(user);
}注意:
BindingResult参数必须紧跟在被@Valid标注的参数后面,错误示例:1
2
3public ResponseEntity<User> addUser(@Valid @RequestBody User user,
@RequestParam("param") String param,
BindingResult bindingResult)
编写测试
1
2
3
4
5
6
7
8
9
10
11
12
13
public void addUserTest() throws Exception {
//language=JSON
String param = "{\"username\":\"baker-3\",\"password\":null}";
String result = mockMvc.perform(MockMvcRequestBuilders.post("/user")
.contentType(MediaType.APPLICATION_JSON_UTF8)
.content(param))
.andExpect(MockMvcResultMatchers.status().isCreated())
.andReturn().getResponse().getContentAsString();
System.out.println(result);
}
运行
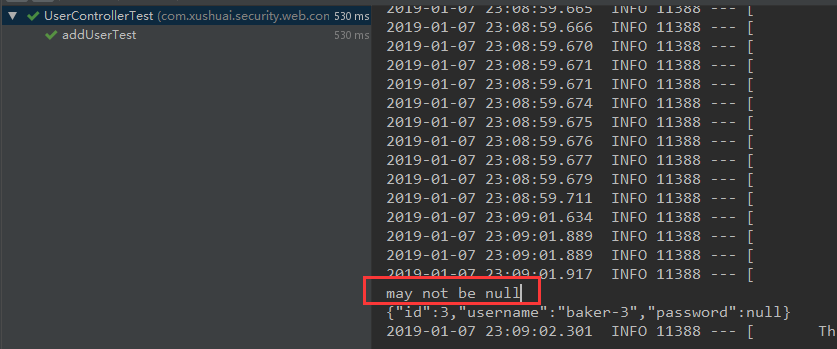
依然会执行创建工作,需要配合自定义异常来使用
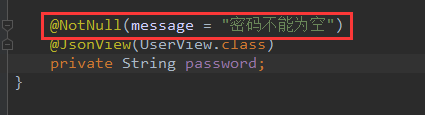
自定义异常消息
再次测试

异常处理
默认错误处理机制
运行项目
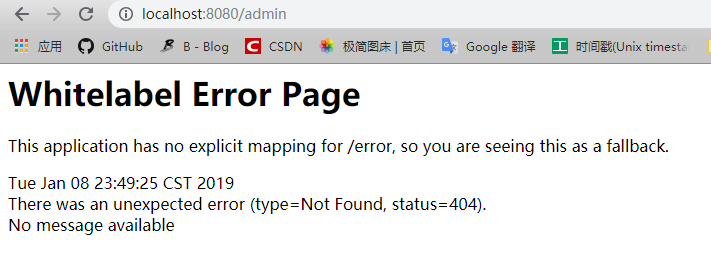
访问不存在的Restful API
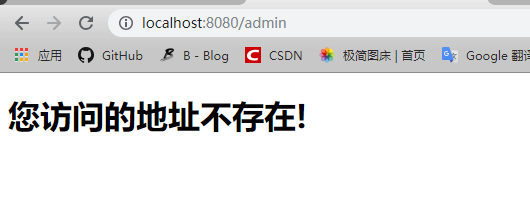
浏览器访问
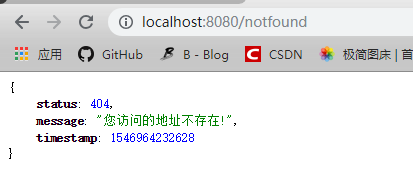
Rest api client访问
这里使用的是postman访问,一个比较好用的rest client客户端,当然也可以使用其他的,工具而已。
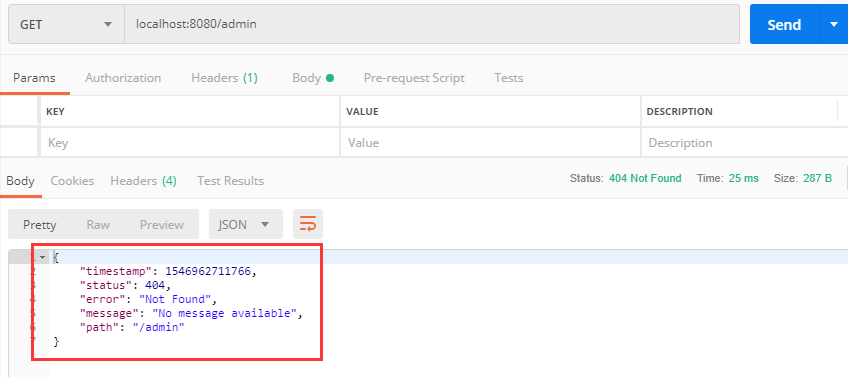
可以看到这里通过浏览器和rest client访问得到的结果是不一样的。这里是Spring Boot默认的实现。这部分源码很容易理解,Spring Boot通过判断请求头中是否含有
text/html,有的话就返回默认的错误页面,否则返回json信息。
自定义异常处理
自定义异常页面
在项目的resources目录中新增文件夹
static.error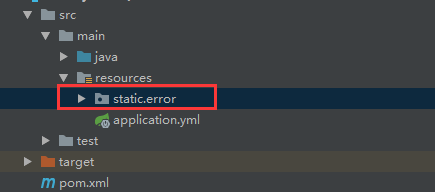
在
error文件夹中添加404.html文件1
2
3
4
5
6
7
8
9
10
<html lang="en">
<head>
<meta charset="UTF-8">
<title>400</title>
</head>
<body>
<h1>您访问的地址不存在!</h1>
</body>
</html>重启并使用浏览器访问,跳转的页面为自定义的页面,文件命名为返回的错误状态码
自定义异常信息
自定义异常枚举
1
2
3
4
5
6
7
8
9
10
11
12
13
14
15
16package com.xushuai.security.exception;
import lombok.AllArgsConstructor;
import lombok.Getter;
public enum ExceptionEnum {
URL_NOT_FOUND(404, "您访问的地址不存在!");
// 错误状态码
private Integer code;
// 错误消息
private String message;
}自定义异常
1
2
3
4
5
6
7
8
9
10
11
12
13
14
15
16
17package com.xushuai.security.exception;
import lombok.AllArgsConstructor;
import lombok.Getter;
import lombok.NoArgsConstructor;
/**
* 自定义异常
*/
public class UserException extends RuntimeException {
private ExceptionEnum exceptionEnum;
}自定义异常返回对象
1
2
3
4
5
6
7
8
9
10
11
12
13
14
15
16
17
18
19
20package com.xushuai.security.exception;
import lombok.AllArgsConstructor;
import lombok.Data;
import lombok.NoArgsConstructor;
public class ExceptionResult {
private int status;
private String message;
private long timestamp;
public ExceptionResult(ExceptionEnum exceptionEnum) {
this.status = exceptionEnum.getCode();
this.message = exceptionEnum.getMessage();
this.timestamp = System.currentTimeMillis();
}
}定义Controller通知
1
2
3
4
5
6
7
8
9
10
11
12
13
14
15
16
17
18
19
20
21
22
23
24package com.xushuai.security.exception;
import org.springframework.http.ResponseEntity;
import org.springframework.web.bind.annotation.ControllerAdvice;
import org.springframework.web.bind.annotation.ExceptionHandler;
/**
* 定义controller通知
*/
public class ControllerExceptionHandler {
/**
* 当controller抛出UserException执行该方法
*
* @param e UserException
* @return ExceptionResult
*/
(UserException.class)
public ResponseEntity<ExceptionResult> commonExceptionHandler(UserException e) {
return ResponseEntity.status(e.getExceptionEnum().getCode())
.body(new ExceptionResult(e.getExceptionEnum()));
}
}启动测试
启动前,在UserController中新增一个controller方法,在方法中抛异常即可
1
2
3
4("/notfound")
public void notFound() {
throw new UserException(ExceptionEnum.URL_NOT_FOUND);
}测试
如果有新的异常信息,只需要在异常枚举中新增即可。

